Saturday, April 30, 2022

Soldiers Of Napoleon a brief solo try

Being a grey dank Saturday here in Ulster I managed to get new 'Soldiers of Napoleon' rules put through a brief tryout.

I used the included army lists (covering 1813-1815 in northern Europe) to select French and Prussian forces both of around 800pts. 

There are several sizes of game recommended varying in size from 2-5 Brigades (nominally Division, large Division, Corps and Army) and I tried Corps level with max 4 Brigades per side (generally 3 on table and 1 reserve). 

Points seem fine and as always I view them as simply a starting point to select reasonably balanced forces for quick set up games.

Prussians had 3 Inf Brigades on table with 1 being an Advanced Guard (classed as in Vanguard so must be placed first and to forefront) and a Dragoon Brigade in Reserve. In total 2 Heavy Gun Batteries, 1 Hussar, 3 Dragoon, 1 Grenadier, 4 Fusilier, 4 Musketeers and 3 Reserve (using Landwehr stats)

French had 2 Inf Brigades on table (1 of Provisional/2nd Rate types) with a Brigade of Dragoons also on table with their Reserve being a Brigade of Young Guard. French also used a couple of unit specific options like Heroic Commander, Gunnery Expert and Le Beau Sabre (boost to Cavalry unit in melee) to balance points. In total 3 Heavy Batteries, 1 Light Horse Battery, 4 Young Guard Inf, 1 Light Inf, 1 Line Inf, 1 Veteran Inf, 4 Provisional Inf and 3 Dragoons.

Forces are also rated by Unit Morale Values (familiar to anyone who has used authors Battlegroup WW2 rules) with French totaling 20MV and Prussians 25MV (difference mainly due to Young Guard). 

Units are also rated for Skirmishing ability (0-3) and Skirmish figures/stands are deployed on table if desired allowing Skirmish Fire, along with possible use of usual gamut of Napoleonic formations such as Square, Assault Column, Extended Line (Light Inf only) and of course Line. 

Units have their own stats line which include Discipline level (used to Save from Musketry), Firing ability, Melee ability, Skirmish ability rating and Shock Impact ability of Cavalry.

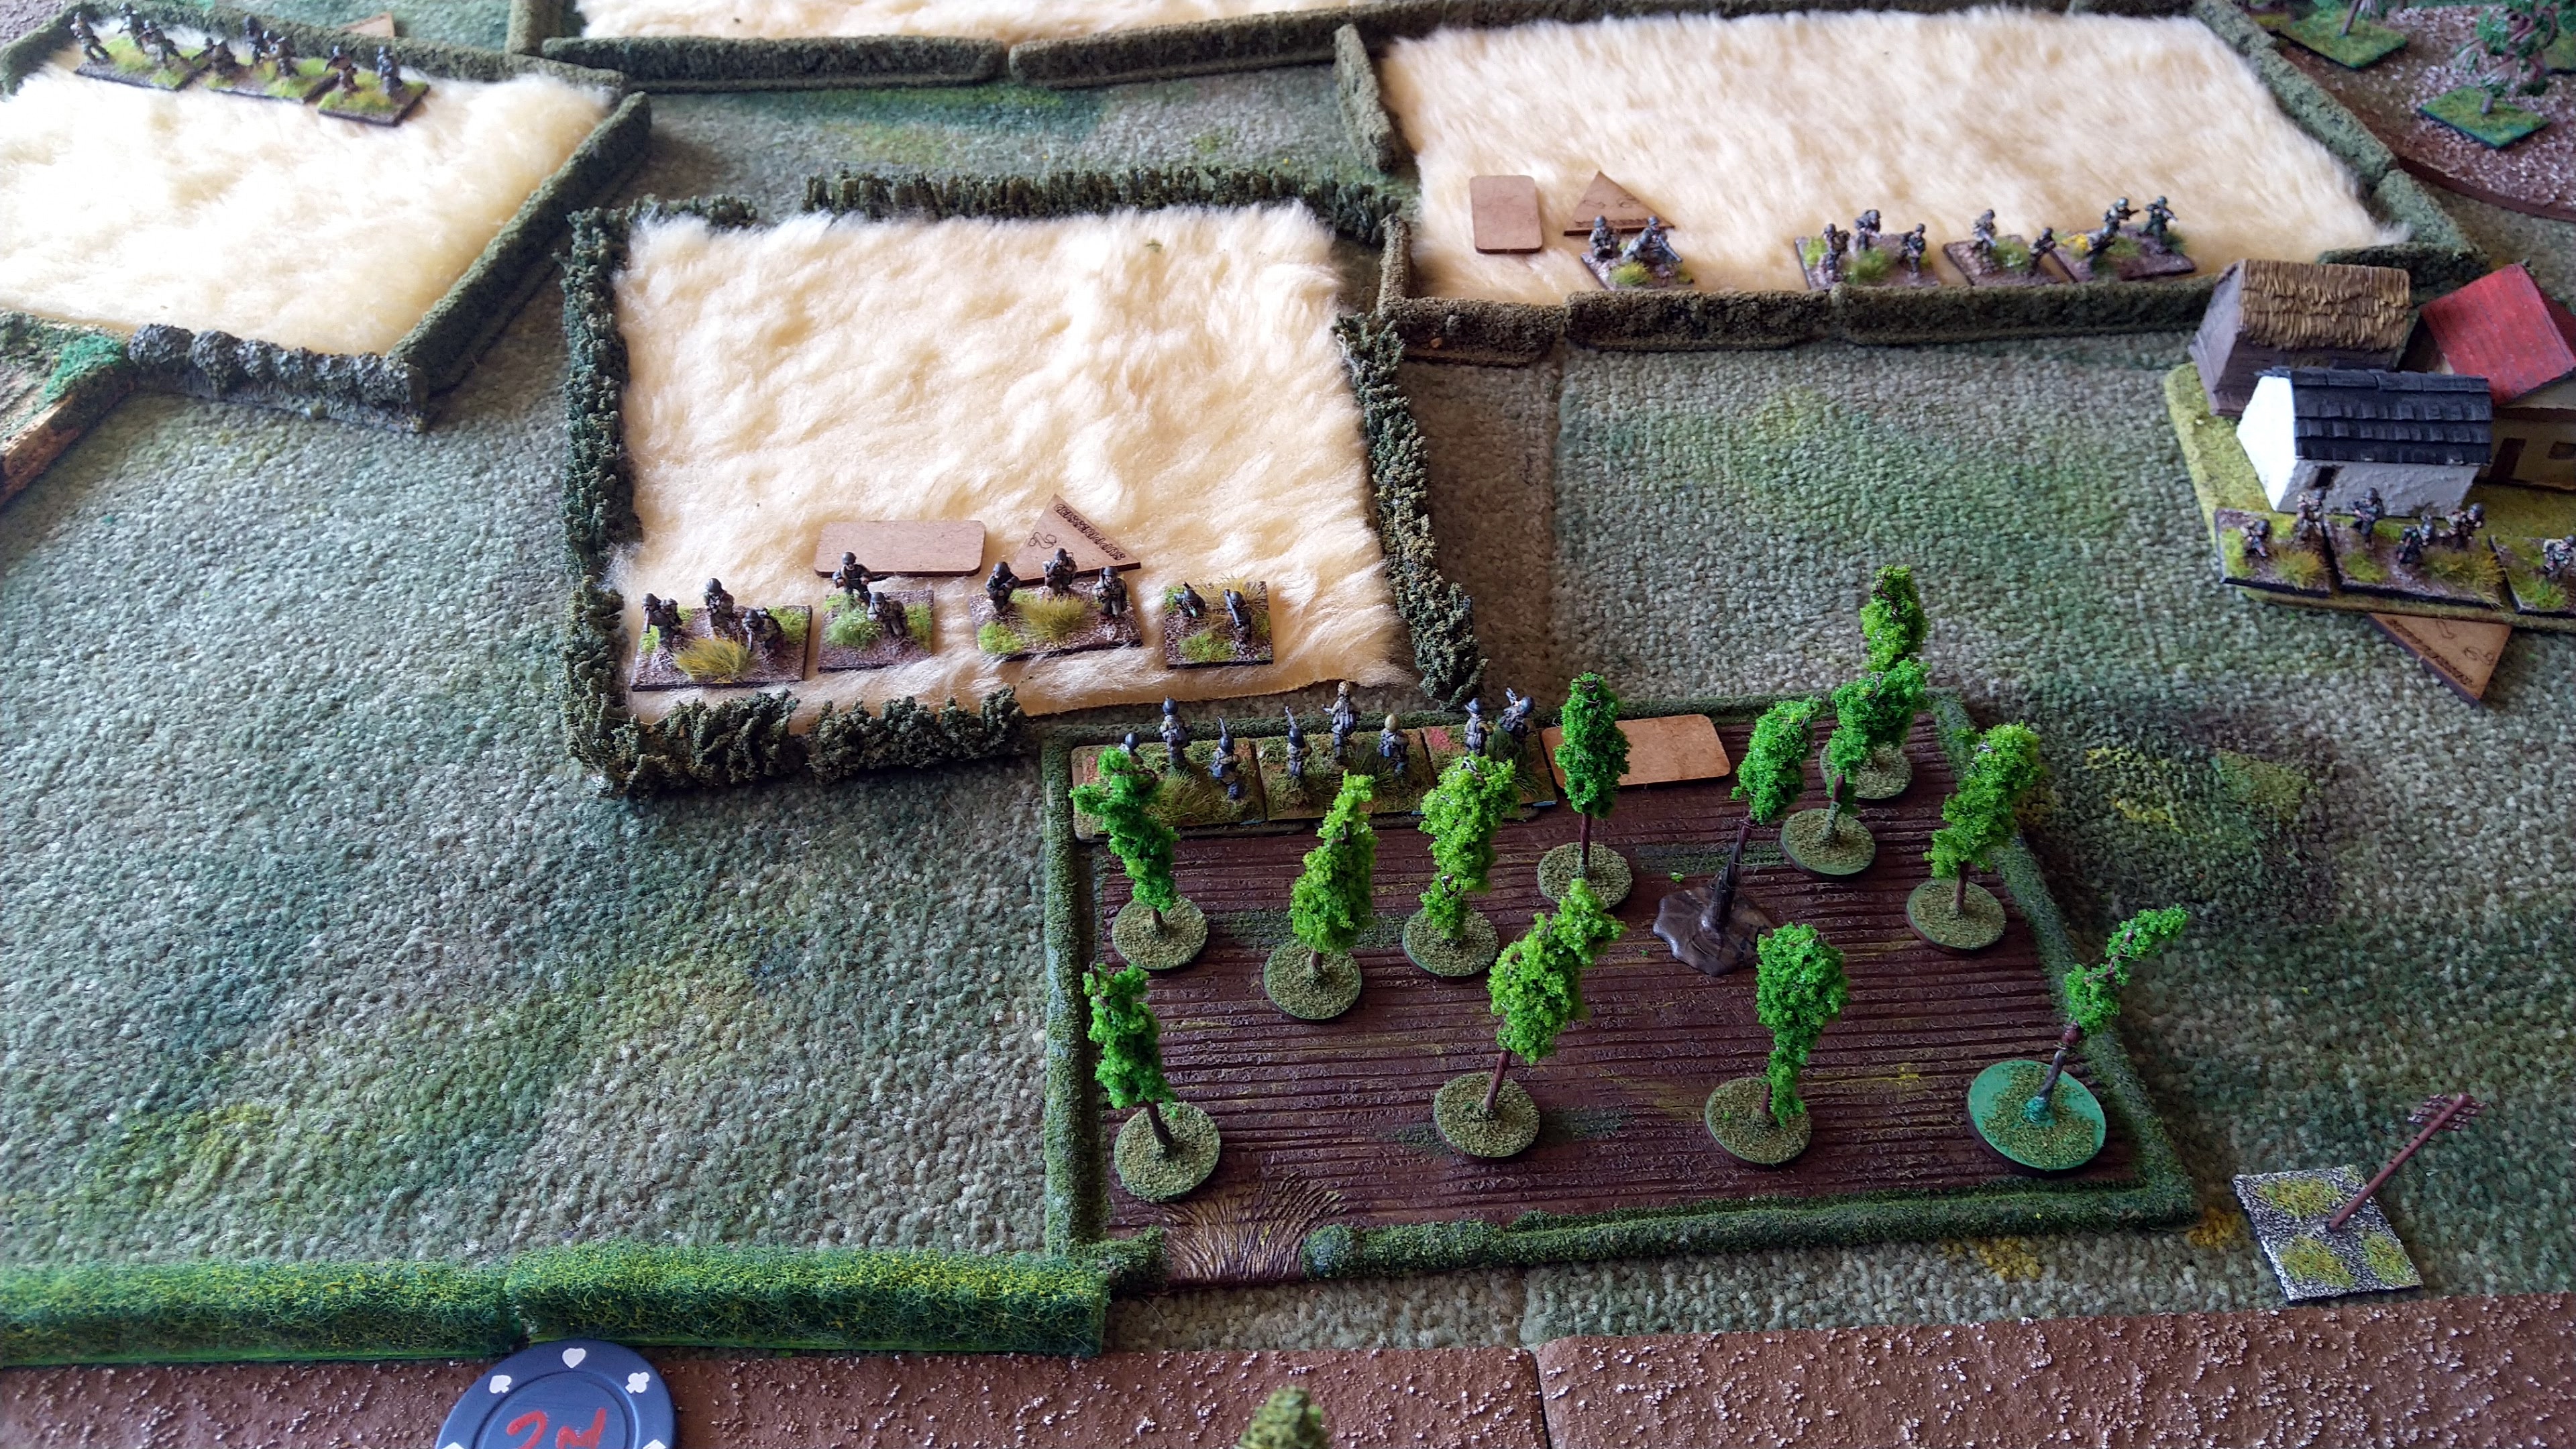
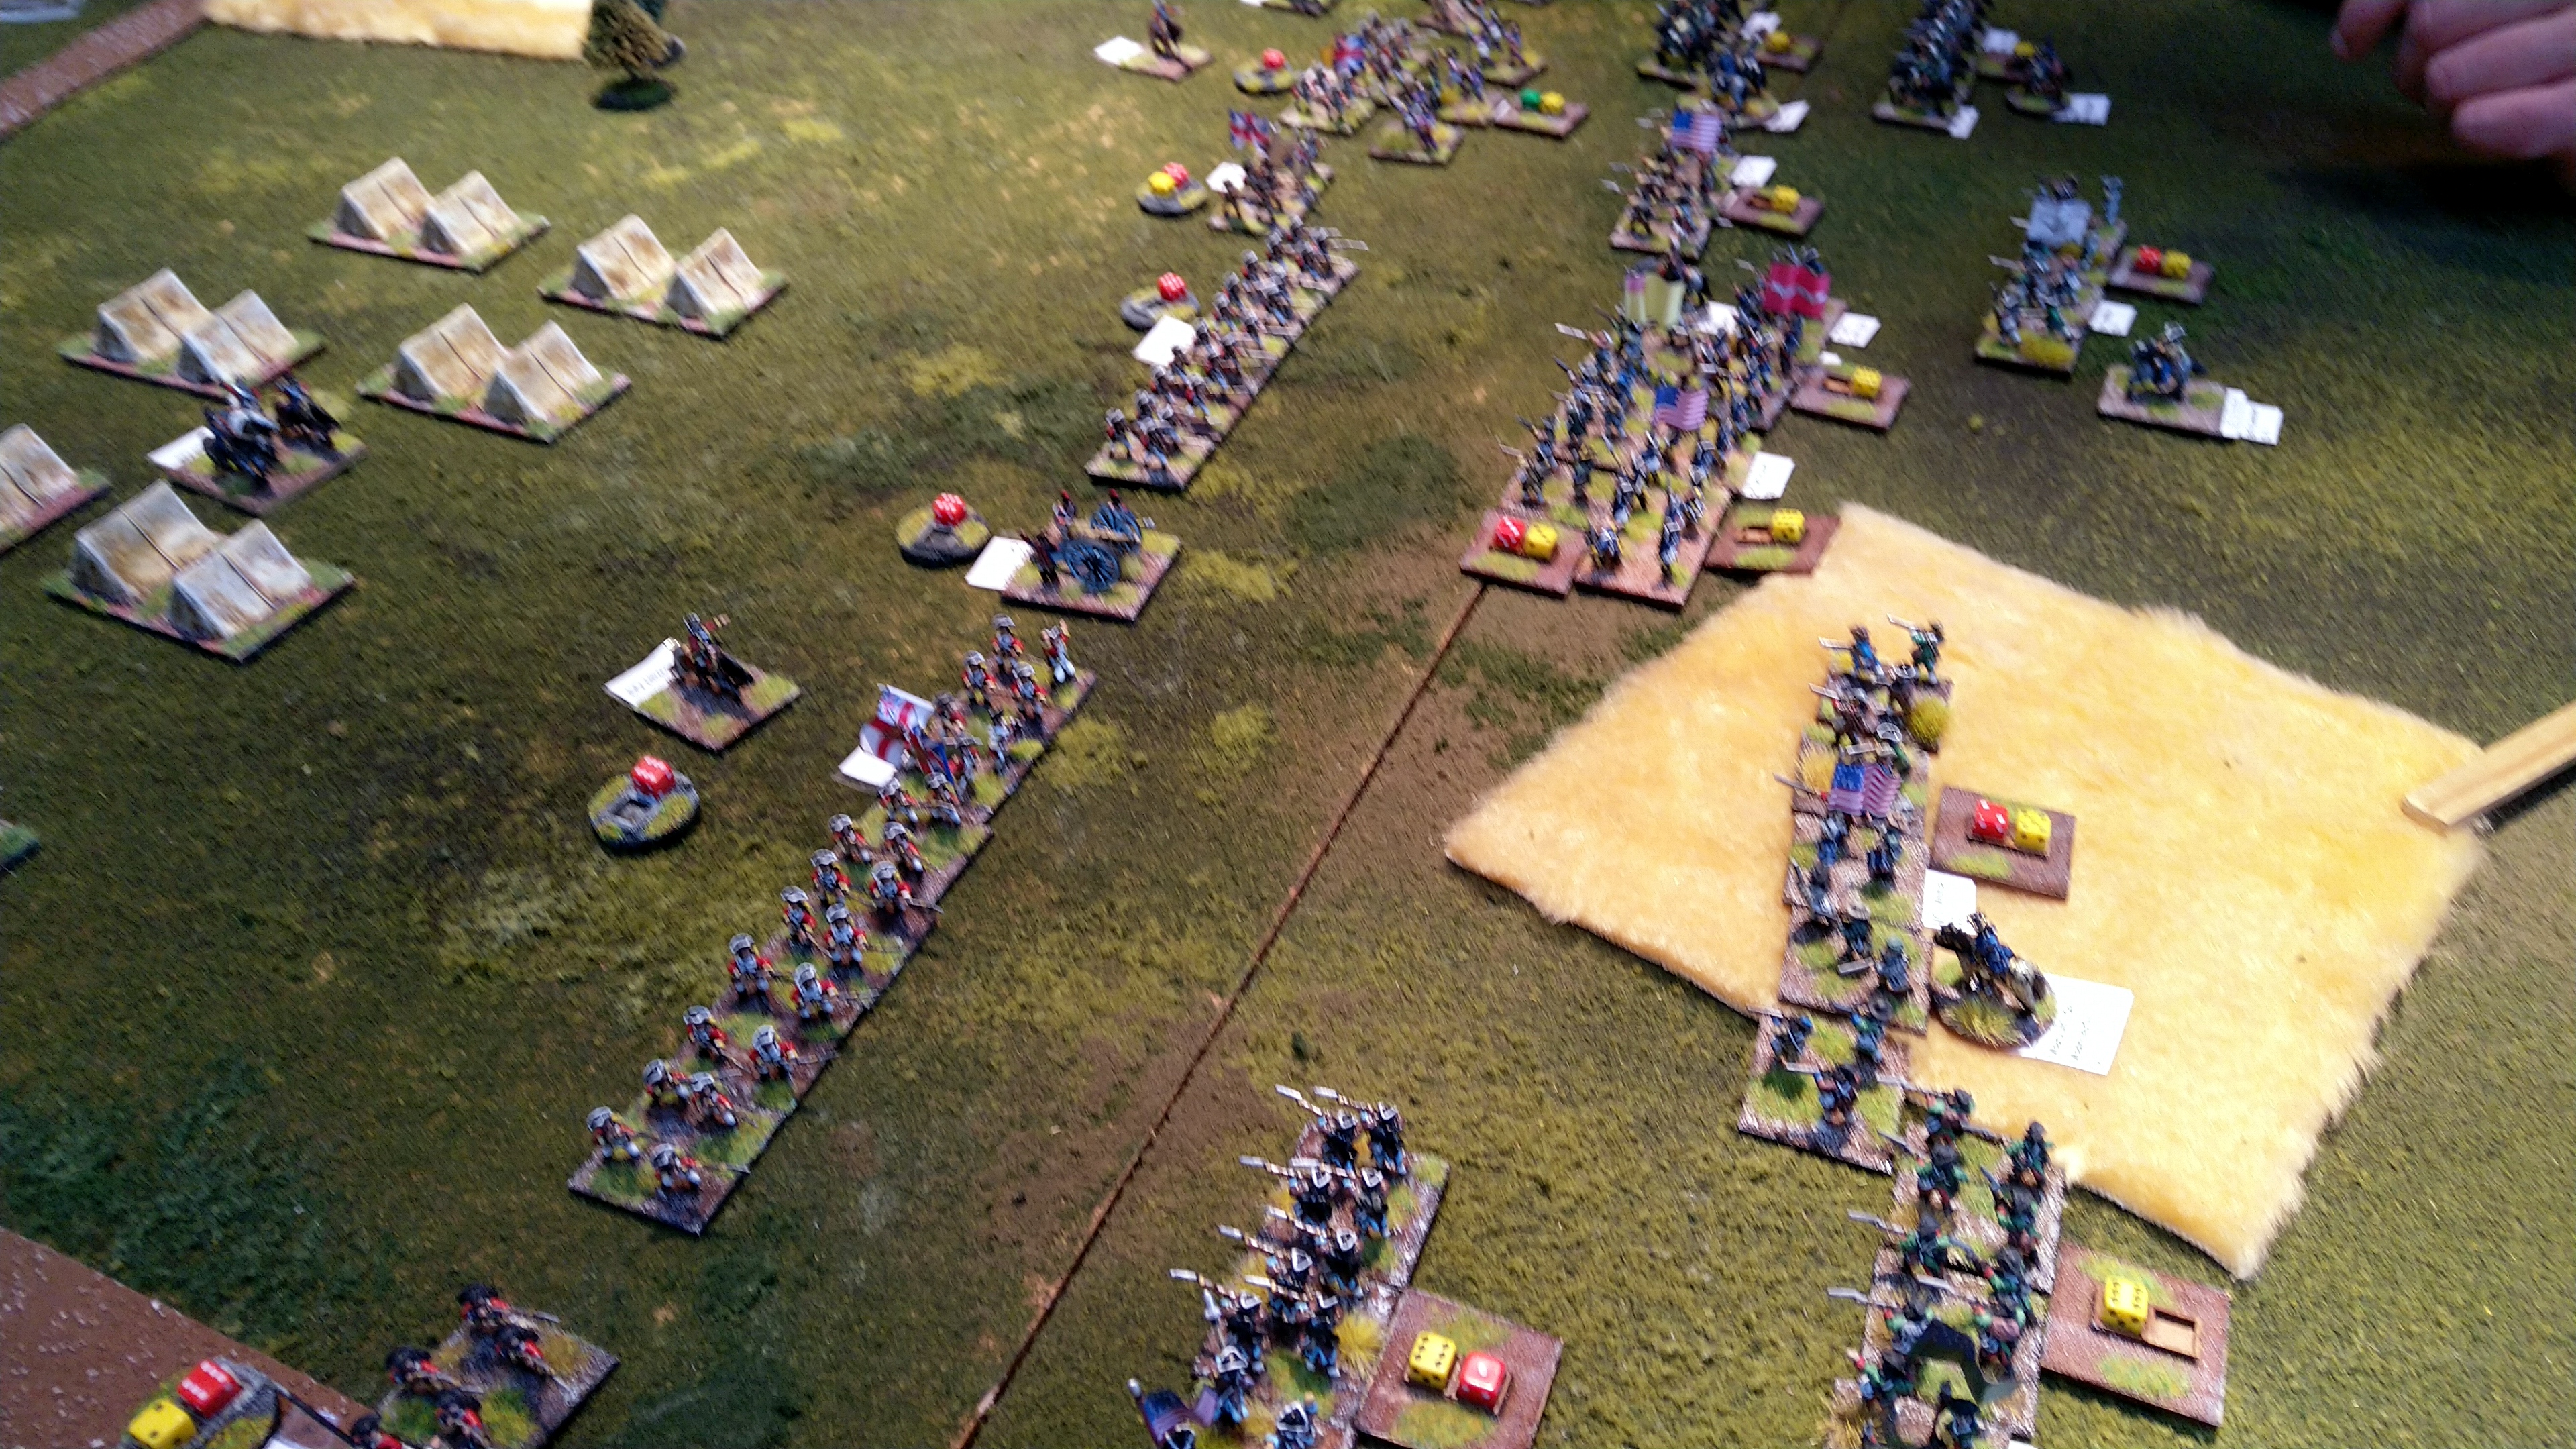
Rules include a terrain generation system (using the included card deck) and several pre-game options as to deployment types (such as Echelon right/left, Centre Forward etc) and optional special events. This lead to decent looking battlefield and set up.


Prussians set up with Echelon to Right and Steady Advance orders (whilst French used Echelon Left and Defend orders which granted them a line of entrenchments).


The core of the game system is the deck of 55 cards which are multi purpose allowing use as Orders (a selection of varied Movement, Volleying, Cavalry Intimidation and others) a Special Event/Action or for Rallying and inevitably lots of key decisions to make regarding said usage. 

Each force gets a basic 2 cards per turn plus their number of on table commanders (but only of not at risk ie too close to enemy) so each started with 6 cards in my game.

Initiative is established to see who plays first card and play alternates although use as an Event can sometimes allow more than 1 card to be used by a side. 

Only if you have less cards available than enemy can you pass making them go first if desired. Once both sides exhaust card hand an End Phase takes place wherein any Risk to Commanders is dealt with, possible Reserve Arrival adjudicated, Victory Points amassed and Initiative established for following turn.

Movement, Shooting and Combat is all really fairly standard using D6 with nothing startlingly different from several other sets with twists being adjustments for some Events/Actions on cards (maybe a boost in dice rolled due to Fierce Charge or similar). 

Only Artillery stuck out as seeming a bit less potent than usual as usually only 2 dice needing 5+ until at Cannister range when its 4 dice at 4+ but not played enough to be sure and the ability to inflict DP at range is possibly powerful enough.

Big part of system is the use of Disruption Points (DP) which are accumulated through Hits (or maybe pushing units too hard) with a unit becoming Disordered when DP equal number of stands and being Destroyed if DP exceed remaining stands (only in End Phase). 

Units vary in size from 2-6 stands with 4 being average (and what I used) so easy for units to get in trouble pretty quickly.

This is key area of management as the Rallying system means use of cards which are variable in restriction of which Grade of unit can use them and can cost between 0 and 3 VPs awarded to enemy to use them. 

Rallying is bit different overall as it includes 4 options like Withdraw and Rally 1 DP, try to Rally all DP needing 6, exchange a stand permanently for DP removal and Redress Ranks of Disordered units.

I managed 3 full turns but units not really gotten to grips yet but some nice narrative style action via card play with off table Support Artillery shots, Prussian Commander being wounded (with loss of attached Command Points which allow re-rolls and similar), Senior Commander failing to appear (your Superior can visit your section of battlefield),  

Have tried several Order types (not optimally but just to test) with 'Harry and Harass'  (allows LC to thwart enemy Skirmishers at risk of a DP), 'Intimidation' (HC can cause possible DP on enemy Inf) being a couple of more unusual options to standard Movement. Formation Change and Charging types.

Not conducted any Melees yet but looks fairly straight forward process so not tested Cav vs Inf in Line/Square or Attack Column vs Line which are always key points in any Napoleonic set. 

Of course very early days with rules but a lot to like so far within its parameters (only part of a battlefield not a full battle) and the cards are easy to use and interesting in themselves. 

Only a couple of questions arose (nothing major) and only real gripe is the lack of QRS (printed on inside covers) and that the QRS lacks some detail (eg no mention of firing ranges) 

Overall a thumbs up and if you like (Sam Mustafas) Maurice 18th Century rules these have a similar feel regarding card deck use and level of complexity (low to medium) but with of course own feel and twists.

Hope to give these further exploration but planning another O Group game so may get heave ho from table.


Initial forces deployed


French with Provisional Inf entrenched in centre, Dragoons on their right and Line Inf Brigade echeloned forward on hill (Young Guard in reserve to rear due 5th turn)


Prussian Vanguard deployed forward in right echelon (Dragoons in reserve off table due on 4th turn))


French Provisional Inf line entrenchments, note card about to be used to generate 4 Orders (the red disc denotes last Brigade to be 'activated' as consecutive activations cause DPs)


French Dragoons have advanced in distance whilst their left wing engages advancing Prussian Vanguard Brigade


Lots of Skirmishing in this area 


Prussian central Brigade pushes forward


Postscript - played another couple of turns this evening and came upon first real dislike/problem with rules with Inf Attack Columns seeming very powerful in the charge. They get number of stands with 2 additional dice so with my 4 stand units a combat worked out defender in Line with 4 Dice (would be same if also in Attack Column) with the attacking Column getting 6 dice not really a big difference but this could mean a Line target with 4 dice being hit by 2 Columns would face a whopping 12 dice ! This was a problem in original Lasalle. Only caveat in SON is that I have so far found that it is not that easy to get charges in or to co-ordinate them but potentially a game breaker as this is not really how I understand the match up to have worked historically. Maybe house ruling that only 1 attacker per target face would mitigate. 


Thursday, April 28, 2022

L'Art De La Guerre - Knights of St John vs Hundred War English (and new Napoleonic set arrives)

Game of LADG today at Stephens to give him some more practice for competition is attending in couple of months 'down South'.

Competition is late medieval (lists 230-268) for which I have no armies so it was a loaner/proxy to field Knight of St John against which Stephen who was trying out a later HYW English list.

The HYW English were an almost entirely foot army (just 2 Irish light horse) and their medium foot longbowmen are bit different than earlier as they are no longer elite but do count as swordsmen in melee and were backed up by several spearmen and a couple of Men at Arms and Elite dismounted Knights and rounded off with a couple of Elite light infantry javelinmen. Total was 23 units with a strategist and 2 ordinary generals.

The Order of St John (a very scratch list on my part) fielded several Impact Knights (some Elite) with some heavy Cavalry Lancers a couple of Medium Bow cavalry and a mix of foot with lowly medium bow, a couple of spearmen and some dismounted Knights as well as a couple of light infantry with firearms and a light infantry bow unit. This totaled 21 units with 2 brilliant and 1 ordinary general.

No much to report as fairly quick game (even after re-setting after getting the terrain set up wrong) with the English shooting proving decisive along with some poor combat rolls (as usual) and the Longbowmen proving more durable than expected, but hopefully giving Stephen some food for thought re army makeup and viability.


Bit of a mish mash of pics as first six are of abandoned game and only last three of completed version


And a new arrival upon my return home (been waiting since Good Friday for these to arrive)

Only skimmed through thus far but the card based orders/command system looks interesting 


Saturday, April 23, 2022

Ulster Wargames Society - Battle of Umboto Gorge (actually pursuit after Isandlwana )

Attended UWS meeting today and participated in very fun game put on by Phil with stuff from his ever excellent 20mm collection (with some venerable Ral Partha, Minifig and Garrison figures on display !).

Game was semi-skirmish style with a set of rules 'Front Rank Fire' (from an old Wargames Illustrated mag) and scenario had a bunch of stragglers from Isandlwana trying to escape across a stream (via 2 fords) after defeat on front slopes of the mountain pursued by a horde of victorious Zulus.

Stragglers comprised of disparate groups of British and Natal Native Contingent.

Billy commanded a group of 10 (?) Brits commanded by a superior NCO (Bob Hoskins), Ivan in middle commanded another group of 10 Brits (with a couple already wounded and therefore slow) and I had control of 14 NNC natives (2 of whom carried boxes of ammo) with a Boer commander and a Boer marksman.

Phil and Jeremy commanded the Zulus

We set up about 18" from table edge 3 turns before Zulus would appear as busy killing of Burt Lancaster, sorry Dunfords lot but with proviso that the Zulu horns may outflank us from either table edge.

Zulus were in large units of 30 or so figures (with each figure signifying 2 warriors so 60 man units !)

Whilst straggling back for several turns (we could run for 5" then walk for 2.5" whilst Zulus could always run 6") we had to try to form nominal lines/units to try to delay Zulus until we crossed table center line when it could be every man for himself.

Great game ensued as we manfully tried to conduct a fighting withdrawal in face of every increasing numbers of Zulus some of whom inevitably appeared on our flank (thankfully Billys not mine).

Ivan did manage to form a couple of 5 man lines and volleyed his pursuers, a hit would cause a casualty but more importantly force a morale test which could halt a Zulu unit for 1 turn (however a roll of 12 on a D12 would allow them to surge forwards an additional 8") but lost too much time using ammo reload  I had sent him (very much a red herring) and then had half his force killed in 1 devastating shower of Zulu throwing spears (thankfully only 1 such 'volley' per unit).

We soon realised that single men could delay the Zulus as much as a group and once across the center line that is what we tried with single figures trying to sell themselves dearly whilst mates fled.

I had a single NNC warrior hold up a Zulu unit for a glorious 4 combats (each combined turn roughly 8 secs only but still some sort of native Ninja character to last 16 secs !) allowing bulk of my chaps to outdistance warriors, in contrast my Boer marksman fired 3 times only hitting once with Zulus passing tests and indeed surging forward to overwhelm this Dutchman instantly.

Ivans remaining 5 Brits got caught by Zulu swarm but again held them up before being wiped out.

Meanwhile Billys bunch were heading for ford hell for leather with couple of blokes similarly delaying Zulus on his flank with shooting and fisticuffs.

At the end I was defending a ford with NNC whilst covering Billys survivors and sending some of my natives to safety.

All came down to a last gasp volley of spears as our rearguard was crossing the ford with Zulus achieving 5 hits on 8 target figures with Boer commander and 2 British figures surviving to cross ford, loss of either the Brits or the Boer would be an outright win for Zulus (not that they could really lose as such). In the end we managed to 'save' a mere 6 NNC, 2 British regulars and the Boer leader from initial force.

Super fun and many thanks to Phil for providing every thing and running such a entertaining game .


The dispersed stragglers at start with Dunfords camp to rear. My NNC in foreground


Fuzzy Wuzzy pic (oops wrong war) of Ivans Brits


First Zulus appear note my being wary of a 'horn' appearing, Ivan has formed a couple of lines


Zulus 'thousands of 'em' press forward. Ivans line and my marksman pre-doom on hillock, Billys blokes out of shot running to rear 


NNC have also formed a couple of lines just as they reach center line


'Those bloody spears never run out......'


Overview of latter stages as NNC defending ford with Zulus delayed on my flank, Ivans chaps gone and Billys lot reduced to 6 figures with Zulus in hot pursuit from flank and rear.


Also at club the usual suspects had a FOGR game with Spanish Armada force that having not sunk dare to invade English soil (no idea how this ended ?)


Spanish camp with Inquisitors enjoying their 'hobby' in sun


Equally gory English 'bring out yer dead' plague camp


Thursday, April 21, 2022

O Group - 'Advance to Hill 192' Normandy scenario played

Game with Stephen today at mine using O Group and trying one of new Normandy scenarios 'Advance to Hill 192' set mid July 1944 in the American sector.

I picked this scenario as I wanted to give my Fallschirmjager an outing (not seen light of day for eons) and interested to see US troops in action.

Scenario has a worn FJR Bttn in defence with 2 FJR companies supported by usual mortars and artillery with an MG42 section a couple of PzShreks and a Stug III (in reserve), with an additional FJR platoon of 'Tank Hunters' and a not often seen Puppchen light gun. Germans could also avail of using 2 Predesignated Artillery Aim points (allows stonk on a terrain feature without having to have LOS)

Yanks have standard full Bttn of 3 companies with mortars and artillery supported by 2 x MMG sections a platoon of 2 x 60mm mortars and 2 Troops of M4 Shermans (in reserve arriving T3 & T6).

The advancing fire trait of the US infantry is pretty good (do not lose the -2 dice when firing on move at cost of reduced movement) and their 60mm on table mortars are decent extra support and combined with flexible reserves and another trait of having a Aircraft Spotter (allows one re-roll of a failed Artillery roll) they are a quite potent on attack.

The FJR count as PzGrenadiers (the Tank Hunter platoon as standard infantry but with a bonus in combat with AFVs) so usual extra hit on double 6 roll and re-roll of 1 miss if vs spotted target, has potential but subject to vagaries of dice whereas US moving fire is a constant.

Lots of decisions to be made regarding order usage and still not quite sure when is optimum point to deploy units onto Combat Patrols whether on attack or defence as once you are seen you soon draw lots of fire but you cannot do much with just patrols.

The shooting system is very slick and whilst pretty broad brush it suits this level of game.

We really enjoyed the game today and learnt/absorbed a good deal more of the O Group system and its nuances. And whilst we still feel O Group is a bit limited in its scope it certainly does work really well within those defined parameters ie 1 full Bttn plus support vs a reduced Bttn plus support.

I do however wish that the scenario maps showed exactly how many fields to include and their location rather than the standard 'the table should include several' as never sure of using too many or too few or just where they should be ?

Did not finish the game (too much waffle as ever) but FJR were getting worst of it with 1 Fubar and another on its way after several losses including the Stug with the US pretty much still intact (lots of shock but no actual losses).


Overview from FJR right at start (not many units on table but several Combat Patrols)


US Platoon occupies wood on their left


As another deploys of a Combat Patrol into farm


With 3rd Platoon of this Company taking some Shock from my mortars in a field


FJR MG42 opened up on them as well but did nothing before dying tout suite


FJR in ambush in trenches engage from orchard


Some more shock on US units (but FJR were taking actual casualties)


FJR Platoon on left reduced to 2 stands (lost 1 stand plus attached PzShk) and soon wiped out 


Sunday, April 17, 2022

Eutaw Springs with 'Bloody Backs'


Group outing today at Mr Ps gaffe with 15mm AWI kit (of Mr P and Stephen) using a scenario based around Eutaw Springs engagement in 1781.

We tried a set that Stephen found on web (from Steves Painting Shed blog) called 'Bloody Backs' which is still a work in progress but has some very interesting core systems.

Le Duc and I took the US forces (mainly as we arrived first and sat at that end of table) whilst Mr P and John commanded Brits with Stephen umpiring again, mainly as he had best knowledge of rules and had produced a QRS with some amendments for our use.

Rather uniquely the game uses D12 for most everything (unit activation, shooting, melee and morale) in multiples of 6 or 3 usually rolling against a target number based on various aspects such as unit density/formation, comparative unit size and usual tactical factors such as cover and suchlike.

Some further variation when charging with an additional 4 x D12 morale type roll to close with enemy and once in contact again rather interestingly only the attacker rolls dice in the melee (a basic 6 x D12 but can be increased) with every single roll causing a 'success' in melee but resulting hits (not 1 for 1 but based on a table) distributed on enemy or yourself depending on target number needed. 

Jokingly I declared that with this system and my dice rolling I could easily cause more damage to myself than enemy ! but was never tested as I never conducted a charge as faced by a lot of good quality British Grenadiers on my sector.

These (Elite) Grenadiers with decent commander were able to generate lots of double actions (units get 1 or 2 actions depending on number of successes rolled) compared to my more average units which seemed perfectly fine for better troops.

Units can suffer Disruptions (up to 3 with any excess converted to reductions in unit Stamina which was standard 6 for all) which reduce number of D12 one rolls to activate and this management of Disruptions (they can be rallied off 1 at a time) is a key part of the game system especially with lesser quality or poorly led troops. 

Commanders really only function as focal points for Brigade Command and Control as they apply their Command quality to units within 12" but this is a biggie for unit activation eg my lowly Militia if acting outside command radius would roll 6 x D12 needing 1-2 for success but with a decent +4 commander in range this becomes successes on 1-6. 

Once Disruptions kick in a unit might only roll 3-5 dice and if you fail to activate you must take a 3 x D12 morale test which can see unit retire, rout or disperse completely so boosting success number is tres importante.

Stephen did add a commander risk table but not used.

Militia certainly performed like Militia being fairly unreliable under duress but not impotent.

Of course inevitably a couple of problems arose that not fully addressed in such a short set of 'house' type rules but most were easily adjudicated for such as firing from cover, oblique movement, charging 2 units with 1 and splitting fire (this last one generated a fair bit of discussion as seemed tad odd on a couple of occasions).

Personally I found this overall to be a nice playable system and quite dynamic (always a plus for me) and overall had a decent AWI feel to unit types and interactions.

Game was scheduled for 16 turns of which we managed 13 (which is pretty good for a newly played set) and was headed for a draw as neither side really on course to achieve victory conditions in this time frame.


Pics mostly from early turns (ie before front line Militia melted away)