Monday, February 05, 2024

A bit of solo dabbling about - Battle Command & I Ain't Been Shot Mum

Set up and played a couple of 'lonely pint' games over weekend for purposes of rule refreshing and plain old fun because (thankfully) this is how I still see myself and wargaming !


First I set up a Napoleonic game for Battle Command based on an old Lasalle scenario 'Pitschberg 1813' with French attacking Prussians.

However the scenario has French attacking from short end of table and set up right in face of Prussians especially their Advance Guard so all pretty squashed and very bloody from get go.

Forces are nicely balanced but think I would re-jig the table to extend French deployment area by at least 12" and maybe its orientation, so did not complete this one.


French arriving at 'whites of their eyes' range to Prussians


Then I set up IABSM scenario 'Action at Galmanche' from rule book.

Only partly through this as lots of rules refreshing (been ages since used IABSM) but lots of action already.

Forgot that Blinds are auto-spotted on a Tea Break Card so was a bit nonchalant with the British deployments and they were all spotted in one go.

Still the German Pak40 failed to brew 2 Shermans (some damage to gun-sights and mobility) and crew has been reduced to a mere 2 so Actions reduced.

German infantry shooting also sub-par (much less potent than in Chain of Command) although I did miss that Shock is doubled if shooting from Ambush.

British pre-game Stonk did inflict a lot of shock and killed the German Mortar Observer (not sure if any Big Men/Cot CO can call in these now ?)

Had also forgotten that there can be a lot of markers required (I had to dig mine out) with Pins, Suppression, Overwatch, Shock and several types of damage for AFVs but this is a nice playable and flavoursome WW2 game (I prefer it to CoC in many aspects)


British Blinds advancing with Germans all hidden (Green pipe cleaner denotes)


British force of a an Infantry Company (3 Platoons) and 2 Sherman Tank Troops


Pre-game Stonk has inflicted Shock on several German sections


Dug-in Pak 40 lies in wait 


British Blinds clumped together and should have held the Tanks back


All revealed on a Tea Break as too close to enemy d'oh !


Thursday, February 01, 2024

Oudenarde again but with Battle Command

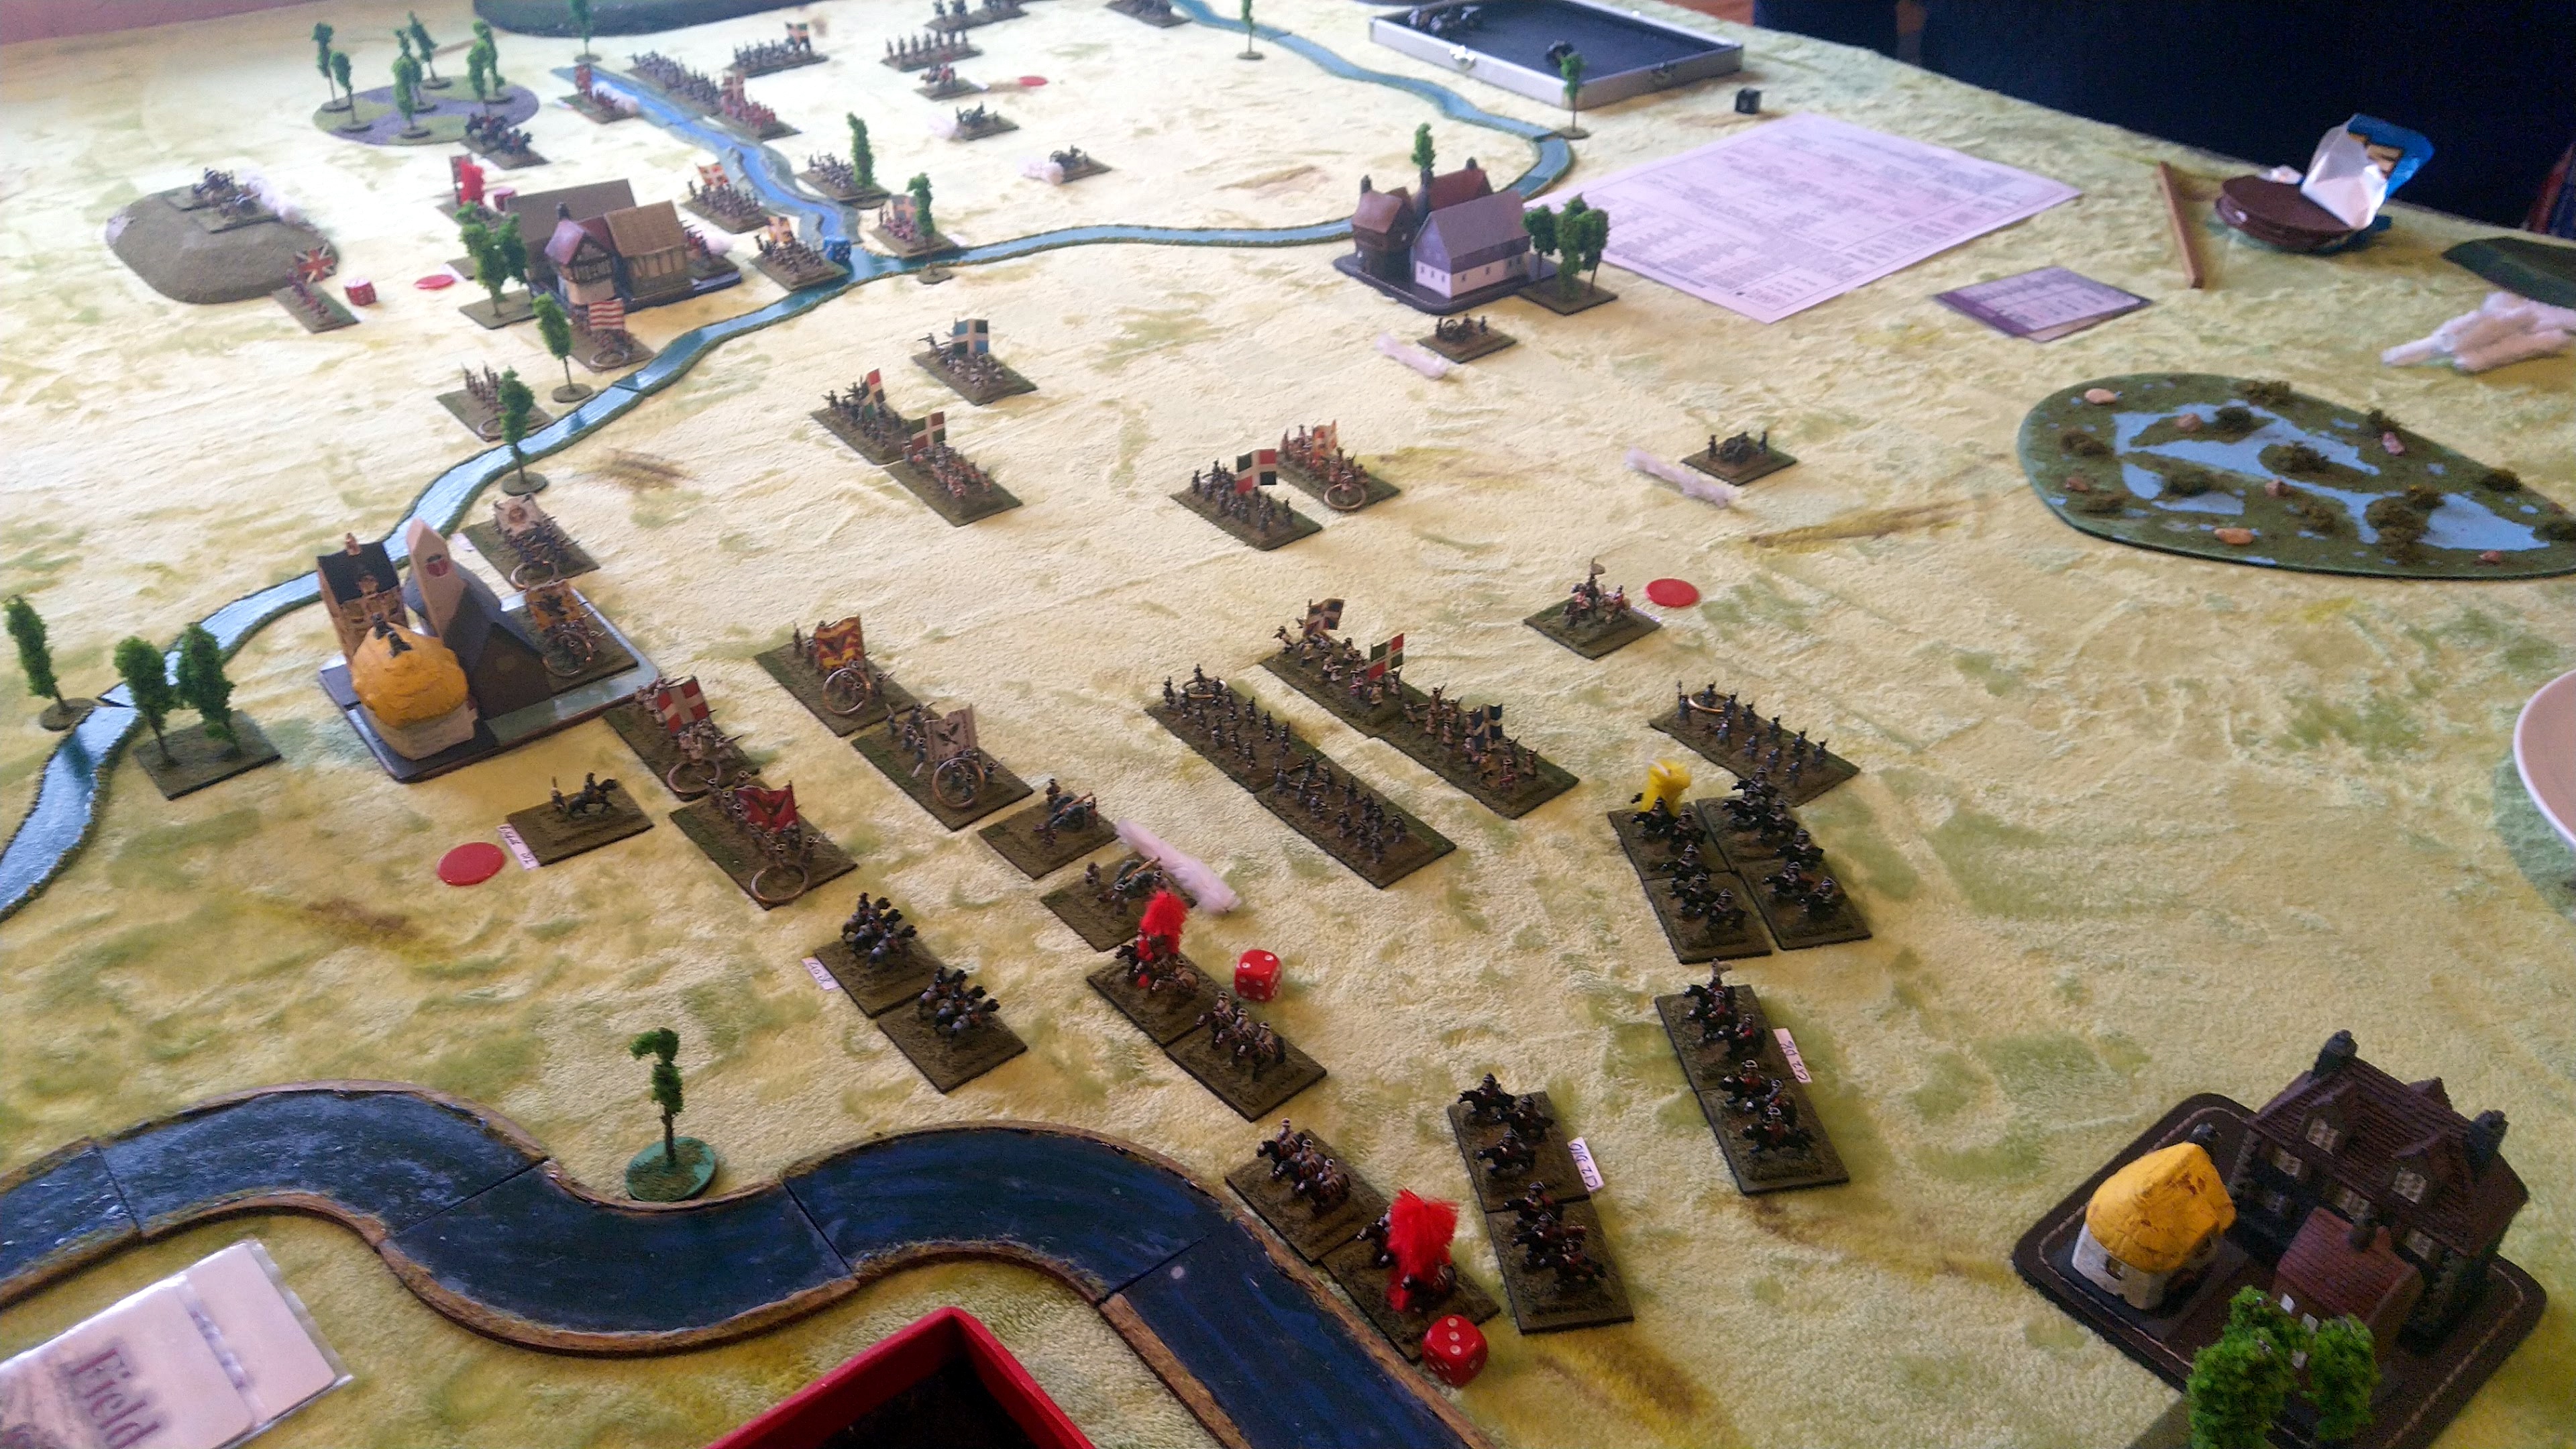
Played Oudenarde scenario again (as too lazy to prepare something else) but this time using Battle Command and with Stephen as French and I as Allies.

This time of course both aware of the flank marchers and the bonus for taking village.

A somewhat different game overall and with some devastating French artillery fire as they routed 2 units (one the Dutch Foot Guard !!) in 2 opening salvoes !

French did not take village and the flank march did very little as faced by ready lines of defenders.

Allies fought decently but their shooting was dire despite having several better shooting units.

French won in end as Allied losses accumulated although actual units lost were much less than previous game.

Despite the better CinC quality I failed so many times to win the initiative dice off with lots of Lost or Tied results reducing my order options or when I did win I rolled Odd again reducing choices whereas the French seldom rolled high but did manage to roll mostly Even maximizing their action choice.

I really like this extra choice forced upon you by odd vs even rolls within the Action Matrix 

Flow of game is somewhat different using BCmd and personally I think it has edge over FOB for 2 player games, but not by much, as really just an alternative way to use dice and card options to generate orders/actions. 

It really is a neck and neck 'race' for which I favour (FOB wins for multi-player).


Allied right under pressure (their guns were soon overrun) from superior French numbers


Four Allied units are routing (2 from each command although 2 did later recover)


French are pouring across stream on Allied left


French preparing for Allied flank march


Both sides suffering lots of disorder 


Allied reserves have arrived but solid line of French face them


Allied centre crumbling with only 2 reserve units arriving to shore things up


Well formed lines of French troops


Allies manage to push back on right but too late


Saturday, January 27, 2024

Ulster Wargame Society - Oudenarde with Field of Battle 3


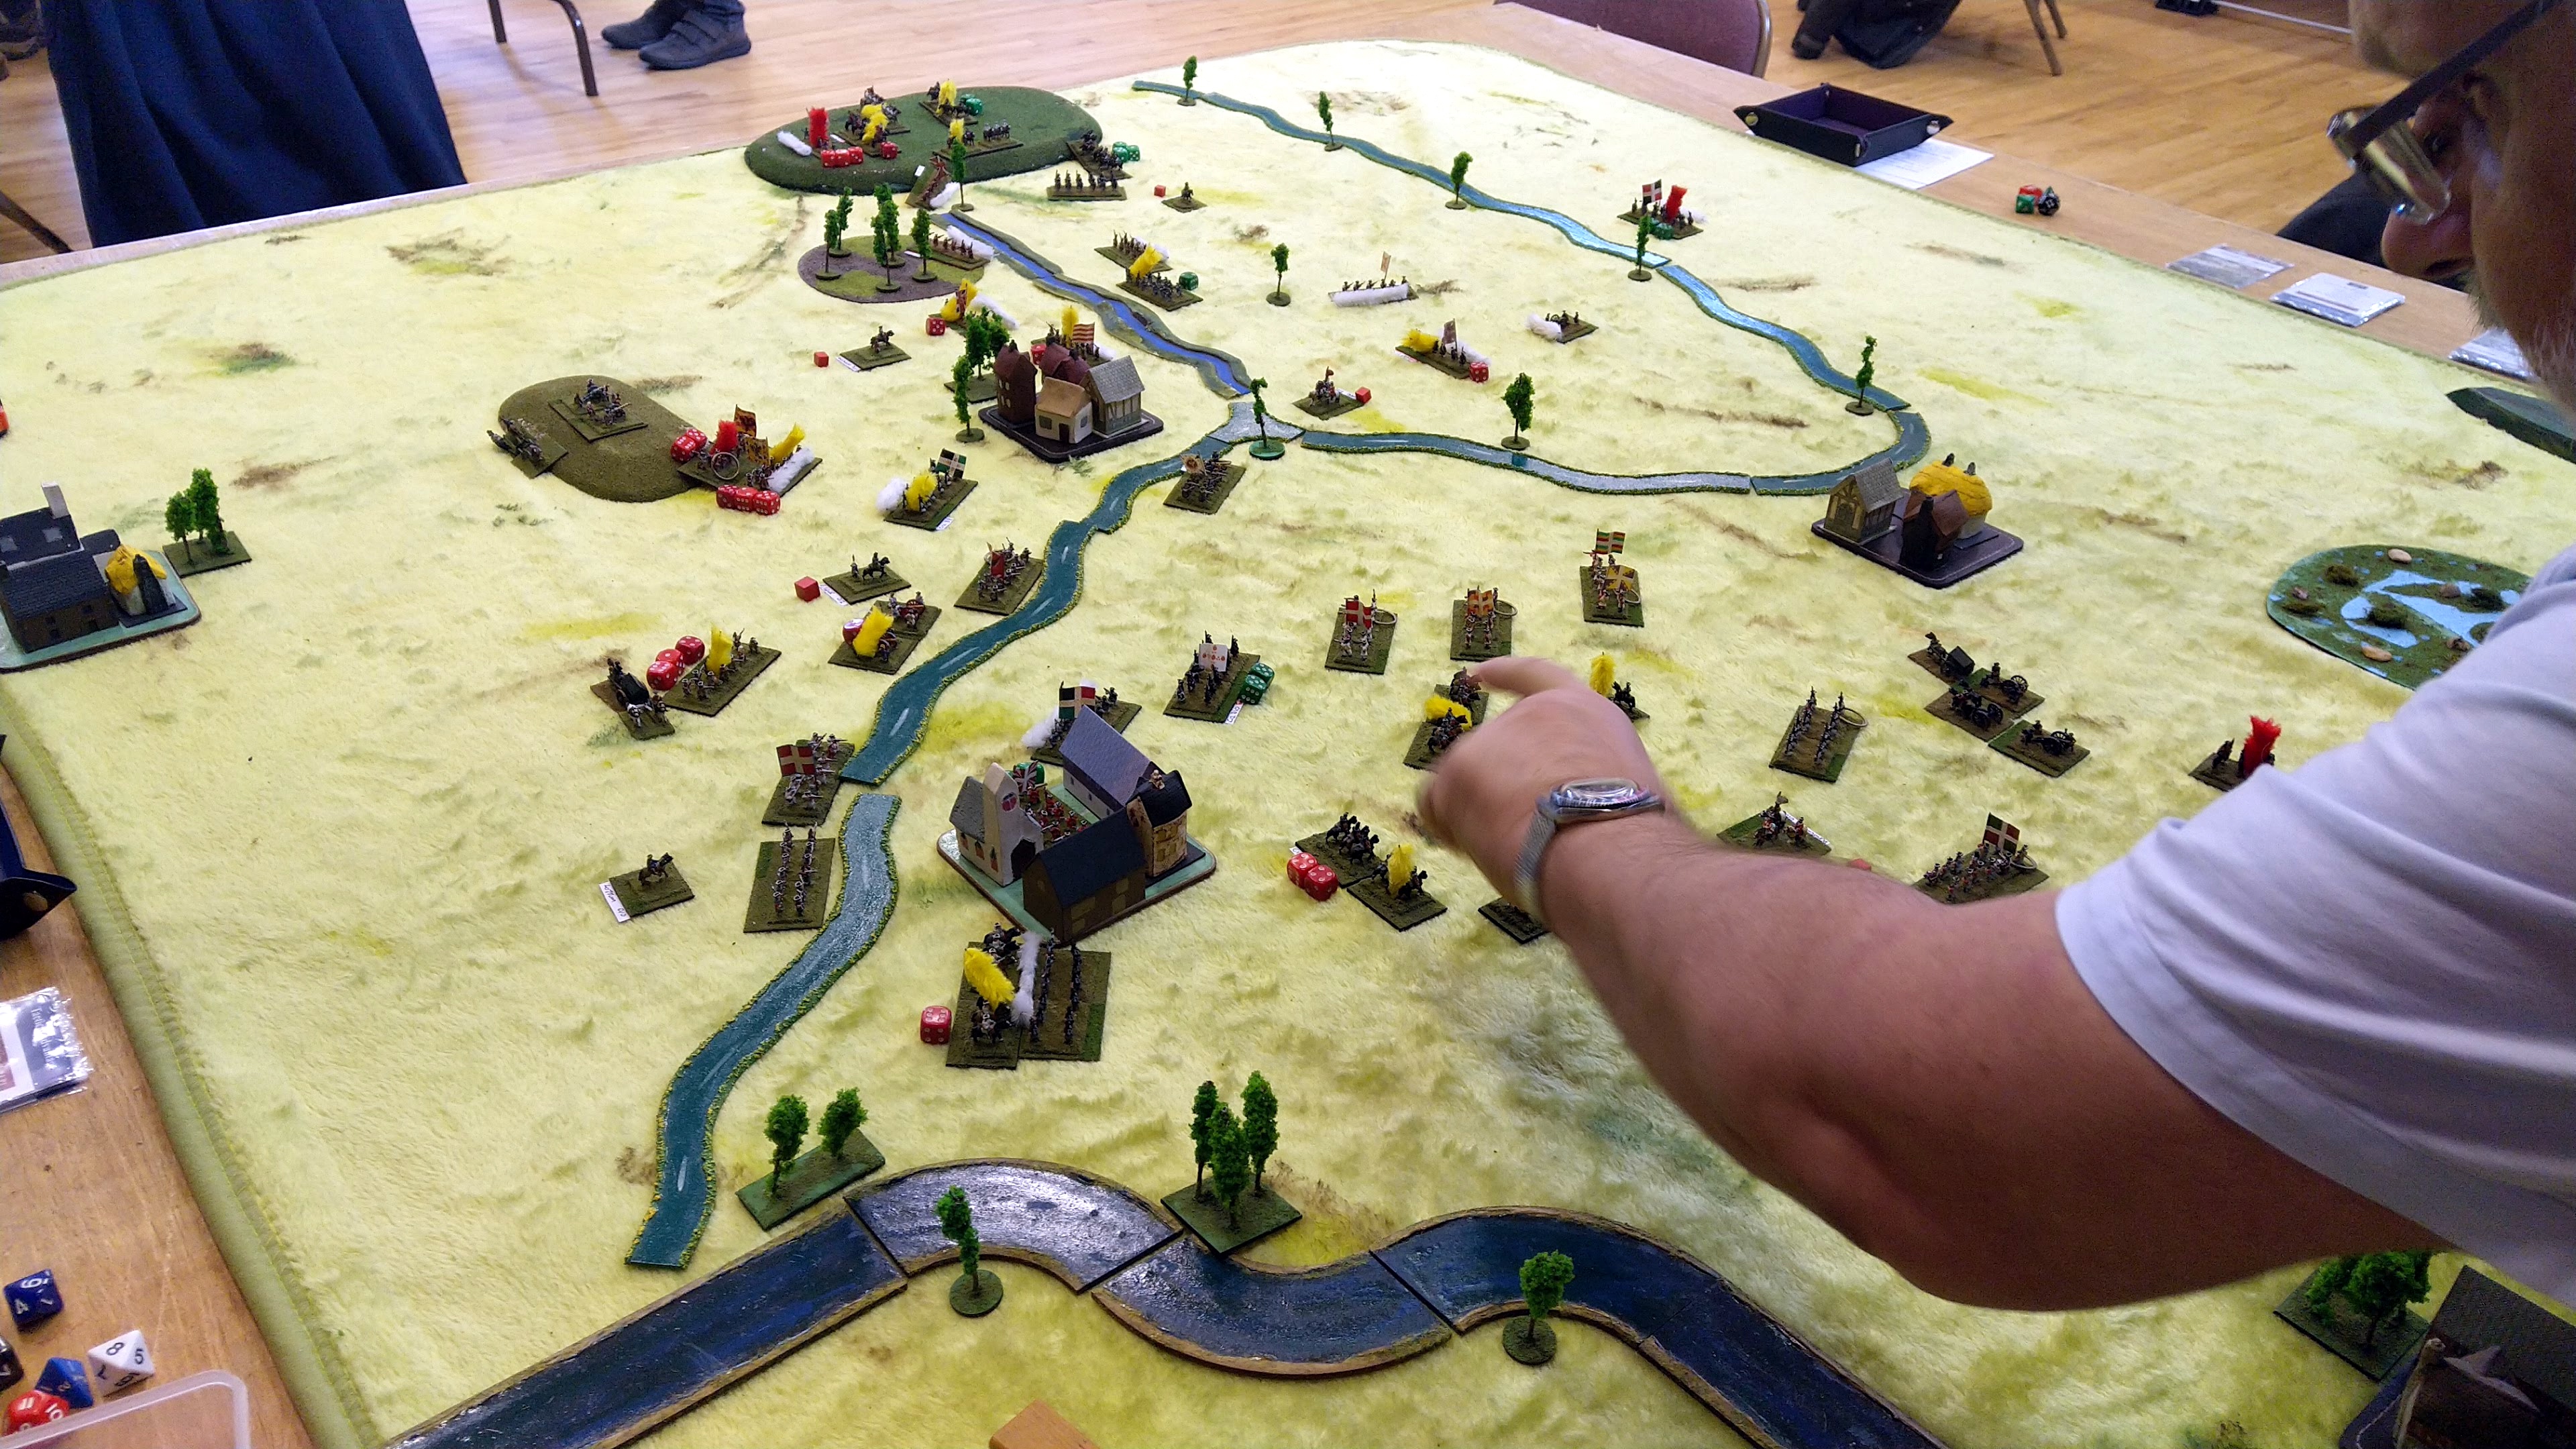
UWS meeting today and I put on another Malburian game with FOB3 and my 10mm kit.

Scenario was based on Battle of Oudenarde 1708 (adapted -ie blatantly stolen- from a Maurice scenario) with units representing approx brigade sized units (4-6 battalions of foot).

French have numbers but are mostly average with average command (only 2 Generals - Vendomme and Burgundy) and control, the Allies are smaller in number but higher quality with better command overall (they start with 2 excellent Generals - Marlborough and Eugene) but with 2 others appearing as reinforcements (Lottum and Overkirk) and a better card deck.

The French could gain 10 morale by capturing a central village (Eyne) whilst Allied reserves under Overkirk could flank march to anywhere on Allied left arriving on their 3rd move card (Lottum was to arrive home on base edge on 2nd Move card).

I had indicated this on the OOB sheets I gave the players (Dave T took Allies and Dave B the French) but they both failed to notice this enemy information (spys and scouts not up to task).

This turned out to be another cracking game that went right down to the wire with both sides almost at zero morale at same time (French greatly aided by swiftly taking that village which Allies had unknowingly left unguarded). 

The Allied flank march (2 Dutch foot and 2 Dutch horse) arrived in good time but made a meal of turning French flank as opposing French horse were, assaulted, outflanked and took several hits but just refused to go away !

French left wing was slow in making progress which helped the Allies (despite Mr T having a run of truly awful dice rolls) and eventually the odds swung in Allies favour. 

Allies finished with only 1 of their 32 morale intact but having been 'gifted' several from French pool of 36 which had concurrently been depleted and the French quit the field after their second Army Morale test (had they gotten another run of cards and results and this might well have seen Allies falter).


Scenario map game was based on 


This is my version of map from test set up at home (I used a 6' x 5' table and did not bother marking roads as no effect in game)


French left wing (in foreground) is making slow progress as Allied left is pinned back along Diepenbeek stream but with Eyne taken already by Swiss foot from right wing


Allies under pressure from French numbers as they await reserves


Later stages as both sides taking losses (note Allied flanking force has arrived on distant hill engaging French horse) 


Several units routing (red markers) with several units having been destroyed on both sides as French left moves to assault just as Allied left is gaining ascendancy


A grim battle of attrition just prior to French collapse


Burgundy on French left is Hors De Combat (dreaded roll of 1 on a D12 test) putting whole of left wing into disorder (yellow markers)


Also today Phil ran a 'Men Who Would Be Kings' game in 20mm (think it was Indian Mutiny ?) but no idea how it turned out ?


Andy and co had final practice with Team Yankee for a competition in Cardiff next month


Mike and Simon played board game ("burn the heretics !" I heard in background) with the excellent No Retreat! The Russian Front which Russians won in 1943 after a large portion of Germans surrounded. Nice to see some cardboard wargaming action.


Thursday, January 25, 2024

Shako II - Gross Beeren scenario and a new Vassal game started - No Retreat! The Russian Front

Game at Stephens today using Shako and a scenario he adapted from a scenario booklet set during Leipzig battles with action at Gross Beeren.

I fielded the Prussian attackers against his French.

I had a whopping 26 (8 in reserve formations) Landwehr units with a 9 Regulars and couple of Grenadiers with 2 Hussars and a Landwehr cavalry unit backed by 2 artillery batteries (tough to use in attack in this terrain). French had several 2 Line units several Regular Line and several Elites, with 6 units of light Horse arriving as reserves and 5 Artillery batteries. 

Odd scenario in some ways as despite being a 6' x 4' board you really only use 4' x 4'. 

Scenario designed primarily for Gen De Brigade with about a third of Prussian Infantry reserves appearing on Turn 6 on the 'unused' left flank portion of table but this is lined by an impassable river cross-able only at at only 2 adjacent bridges. The bridges are however at least 5 moves from entry point and with game only lasting 15 turns the impact of these reserves seems minimal/inconsequential (as essentially only 2 units can cross the bridge in a 2 turn window ?). Think this would be an issue with most rule sets unless some form of march move available (FOB or BP might allow multiple moves to get to bridges faster) and enemy intervention of any kind would nullify this.

The rest of table is literally crammed (even with the small footprint Shako units) with units with 24 units each at start and both receiving reserves in this same sector with both having cavalry among their follow up formations which have limited deployment options (mounted cant enter woods in Shako). Using GDB size units (24-36 figures) would surely cause even greater density (not well read on this action so that may indeed be accurate ?). 

Stephen had reduced the amount of artillery batteries available to both side by a third but the remainder are very effective (especially for defender) as a target rich environment and Shako artillery always causes a lot of casualties (as it should especially once in canister range).

Prussians advanced slowly through woods in attack columns but then tried deploying into line once French artillery started its pounding but suffered lots of casualties.

I did manage to assault edge of Gross Beeren with two units (1 Elite) but was repulsed twice be its defenders. Minor assaults by a couple of Prussians units on my right were easily repulsed. 

A tough task indeed this one but still enjoyed using Shako (one of my favourite sets)


Initial deployments showing density of units and the unused left flank and bridges


Prussian foot on my right in column to move through woods with Hussars stuck in column to use road.


So many units so little room.


The only real open zone was narrow section just in front of village


Initial forces are both 24 units in size so attackers not having any numerical advantage


Another PBEM Vassal game started this week with Mike this time trying No Retreat! The Russian Front (a game I thoroughly enjoy but not played in a while).

We have started with the opening Barbarossa scenario but will likely continue on if no auto victory.

Early stages (ie Turn 2) and the module maybe not as Pbem friendly as last with quite the variety of potential phases cards that can be played in enemy turn so needing to go step by step to allow possible play of such cards, but so far so good.


Germans (moi) just completed moves having gained 3VP so far with 2 captured cities and one surrendered unit.


Close up of the on map units (low counter density is definitely an attraction)


Friday, January 19, 2024

Holland '44 - Vassal PBEM game completed

Finished today a PBEM Vassal game with Mike of the excellent Holland '44 game from GMT which we have been playing since 11th August last year.

We managed to complete the entire 20 turns after starting with the Short scenario and then deciding to play on to complete the Full Campaign as we were enjoying it so much.

The Vassal module is pretty user friendly (lots of nice extra features to help PBEM play) and we had only a couple of minor problems with (mainly to do with Breakthrough Advances) system via PBEM that we ironed out.

Despite having owned game since it came out in 2017 this was my first proper play (having only dabbled with set up and couple of game turns solo) and thankfully between us we managed to sort any rules issues that arose with only a couple we are not fully sure about having done correctly (Remnant units and Engineer Ferries).  

It was a truly excellent gaming experience with great game (and opponent) and so nice to be able to play a game like this to completion (something I just do not think I would ever come close to managing with the physical game), and it broadly followed historical events until last few turns.

Weather had effect throughout with Mike seldom managing to roll clear weather it being mainly overcast or cloudy which impacted his Para replacements and reserves deployments.

We used Vassal for dice rolls and it could be very cruel on several turns but think honours were about even in this regard.

Nijmegen and its environs took much longer to capture for Allies and Frost lasted a day longer at Arnhem despite my German onslaught. I could not manage to eradicate the 1st Para units (so tough !) around Oosterbeek by game end, but Mike could not get any of 30th Corps across the Lower Rhine either so it came down to accumulated Victory Points which gave Germans the win (they score for Allied unit losses whilst Allies score for captured City Hexes).

But honestly winning/losing was really secondary to the enjoyment of game overall for me and no doubt our strategies/gameplay where likely less than stellar but it was just such nerdy fun !


Hard to properly convey action of such a long game but here are a few screenshots (hovering over or clicking on each should enlarge to more readable dimensions) which hopefully show progression of Allied advance.

Turn 3 (situation at end of German turn bottom (Eindhoven) middle (Nijmegen) and top (Arnhem) areas of map. 

Initial assault of 30th Corps in south and US 82nd and 101st around Eindhoven and Nijmegen with British 1st Para in Arnhem (Frost holding northern end of bridge). Scattered and weak (except at Arnhem) German forces trying to delay Allies. Lots of bridges blown by Germans


Then end of Turn 10. 

Area around Eindhoven mostly secured (some minor German units threatening from flanks) but Paras at Nijmegen and Arnhem now mostly out of supply as Germans cut supply lines and airbourne supply depot resources have dwindled. Frost has been dealt with and 1st Para contained at Oosterbeek allowing Germans to enter 'The Island' around Elst.


Turn 16 End

South Holland almost free of German units (a few units will appear later) and lots of bridges secured or rebuilt. 30th Corps approaching Nijmegen in strength opening supply to US Paras. 1st Para just about hanging on at Arnhem (Poles arrived to boost presence)


And Turn 20 the end
South Holland fully secured and Nijmegen bridge in Allied hands and a real tussle developing around Elst. 30th Corps units have crossed Waal elsewhere (via Engineer Ferries). 1st Para barely hanging on but still stubbornly there. 
The Eliminated units box (top left of last pic) tells its own story with large numbers of German units shattered but with significant losses to Allies to counter their territorial gains